Enavigo :: Setting up a project in Eclipse


Creating the required course project structure in Eclipse

If you ever tried convincing Eclipse to use the class-specified directory structure, you know it can be frustrating. This short tutorial shows you how to acheive this slightly elusive goal.

Create a new project.
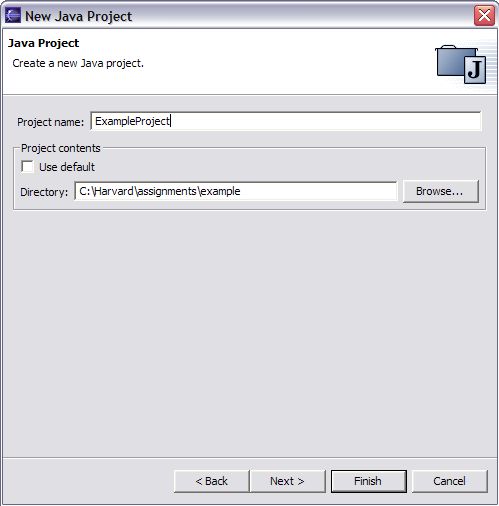
Select 'Java' and then 'Java Project'.
Click for full size image
Give the project a name.
Then, choose a directory for the the development process. In this example I am using a non-default directory - C:\Harvard\assignments\example
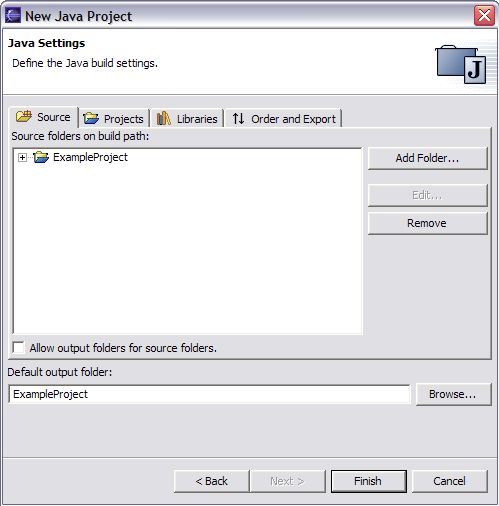
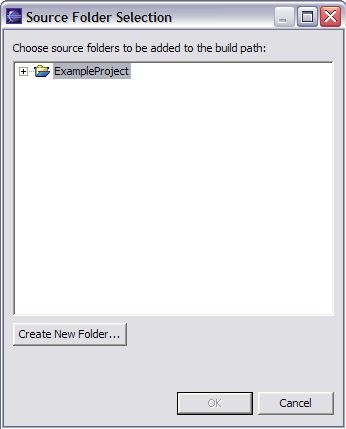
Click for full size image
In the next screen, click on the 'Add Folder' button. Click for full size image
In the next screen, click on the 'Create New Folder' button. Click for full size image
Name the new folder src. Click for full size image
Select the 
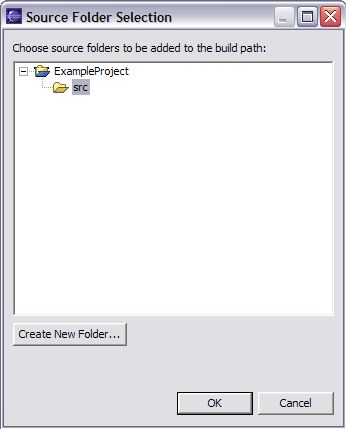
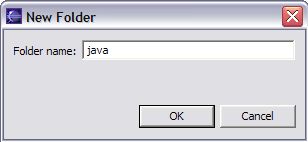
src folder and create a new one called Java. Click for full size image
Click OK and then click Yes on the following screen. Click for full size image
Set the default output folder:
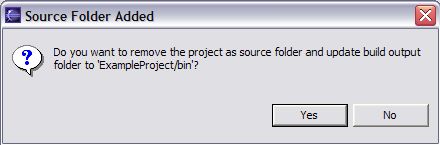
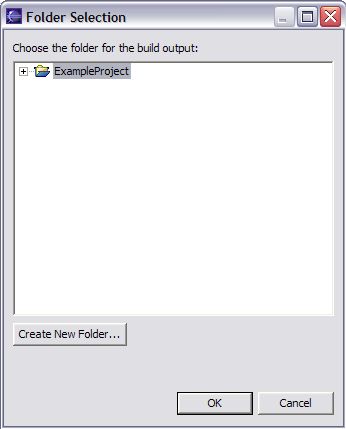
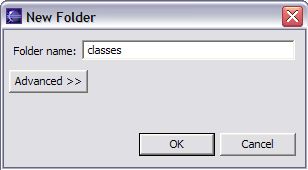
In the build properties screen - to which you will return - click Browse near the text box specifying the output folder. Create a new folder called classes.
Then click ok twice and you will return to the main editor screen.
Click for full size image
Create the source package:
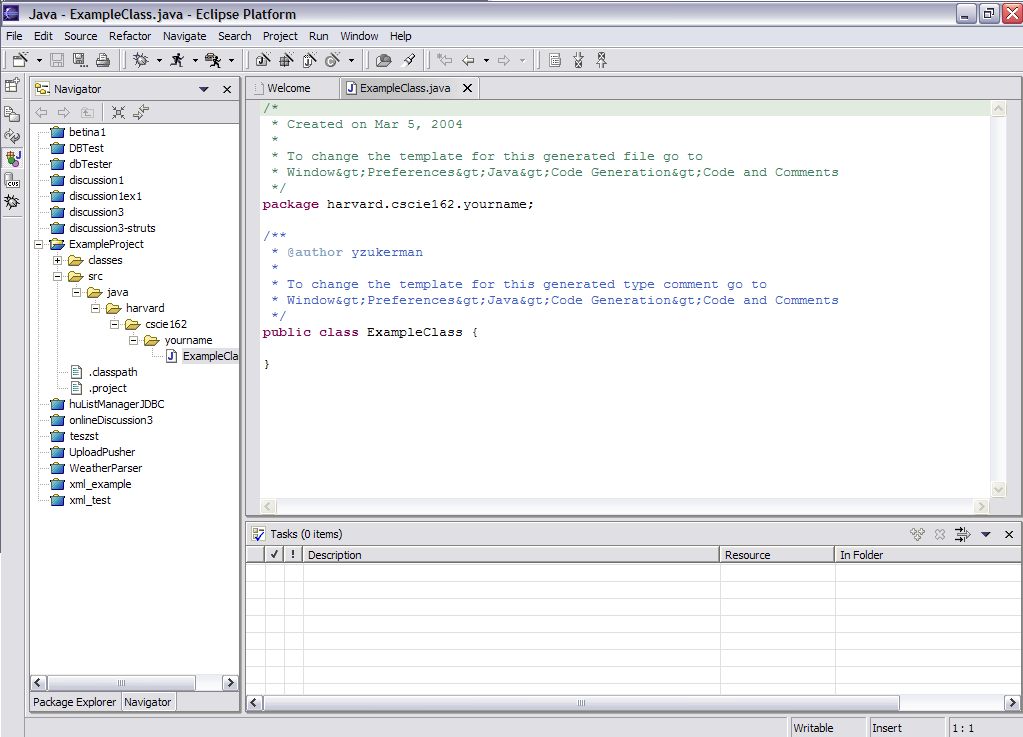
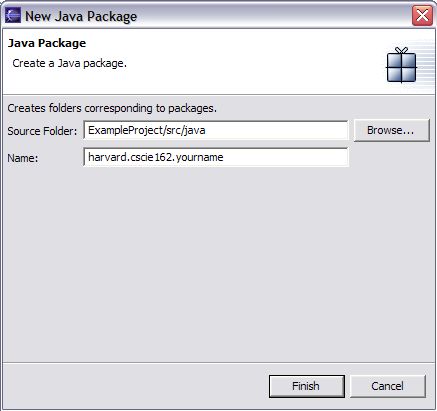
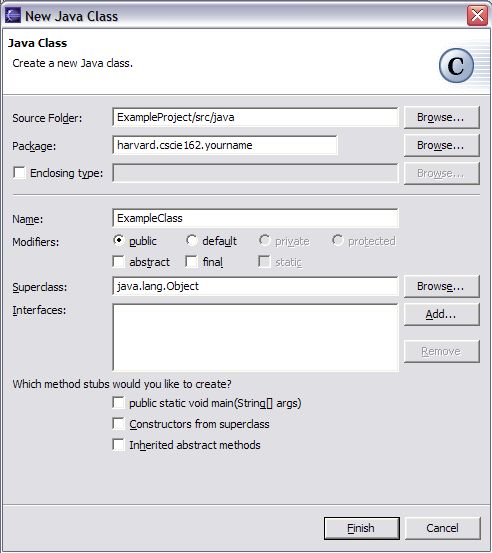
Right-click the name of the project and select 'New', and then 'Package'
Click for full size image
Give the package the class-specified name:
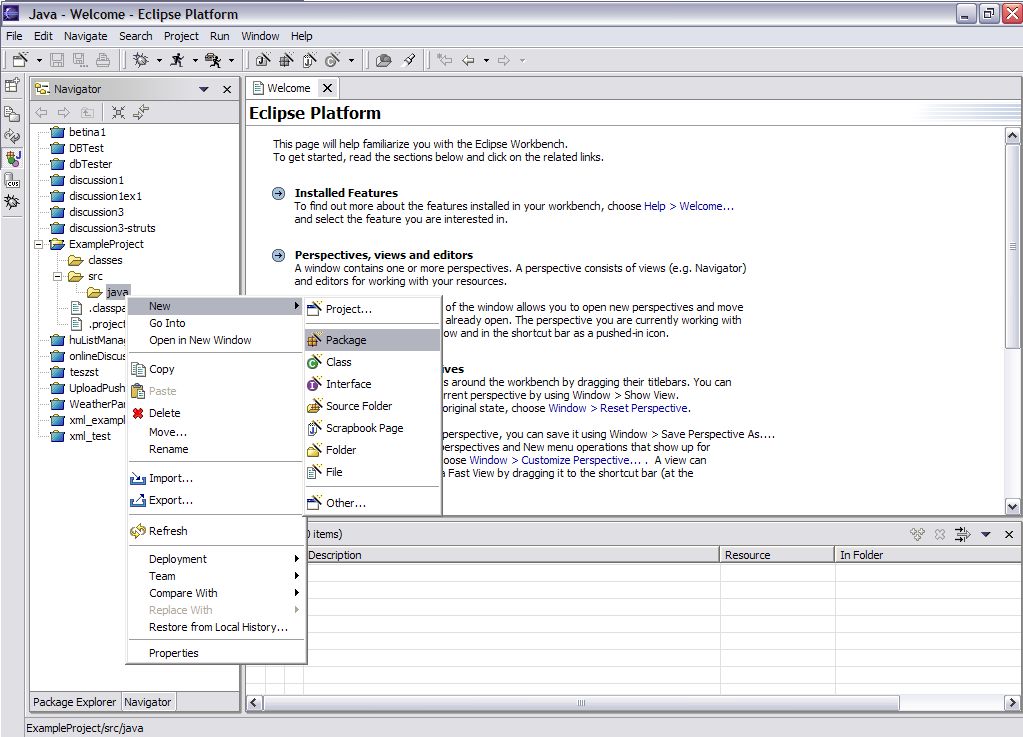
harvard.cscie162.*your name*
Click for full size image
Create a class in the package:
Right-click the bottom folder (the one with your name) inside the src directory and select 'New', and then 'Class'
Click for full size image
Give the class a name Click for full size image
Click Finish.
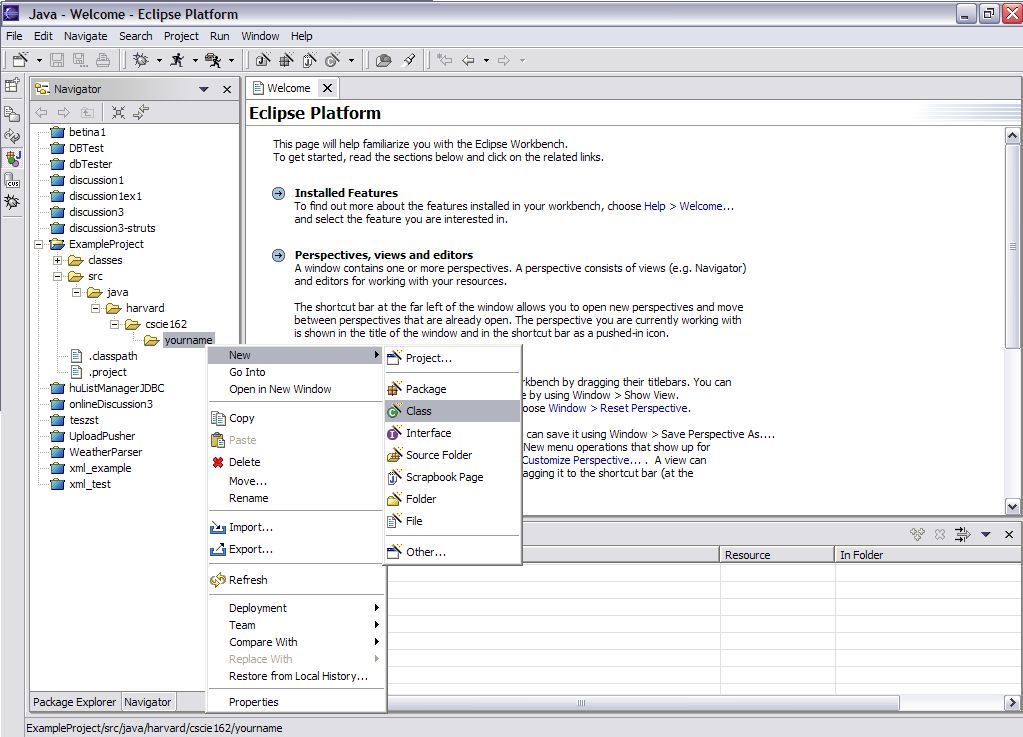
The new class will exist in the specified directory structure.
Click for full size image